With AirPlay2, your phone can easily cast audio to multiple AirPlay receivers, like several HOlOWHAS Ultra/Plus/Max devices. But if you’re using Spotify, it doesn’t support casting to multiple receivers directly. So, how can you play the same song across more than 8 zones?
HOlOWHAS Ultra/Plus/Max amplifier can drive 16 speakers (8 Zones) with one source max. But sometimes, user need amplifier drive more than 16 speakers with one source. This document will guide user how to cascade HOlOWHAS Ultra/Plus/Max amplifier to drive more than 16 speakers with one source.
1.Hardware connection
Before cascading amplifier, we need two or more HoloWHAS-Ultra/Plus/Max amplifier. One of them is mask “master”, the others mask “slave”.
We have two ways to cascading amplifier. One way is analog connection. Another way is optical connection. We strongly advise user use optical connection, because analog connection will lose some sound quality.
A. To connect two amplifiers in a cascading setup, simply run a wire from the master output to the slave input.
B. For more than two amplifiers, start by connecting the master output to the first slave input with a wire. Then, link the first slave output to the second slave input. Continue this pattern if you have additional slaves.
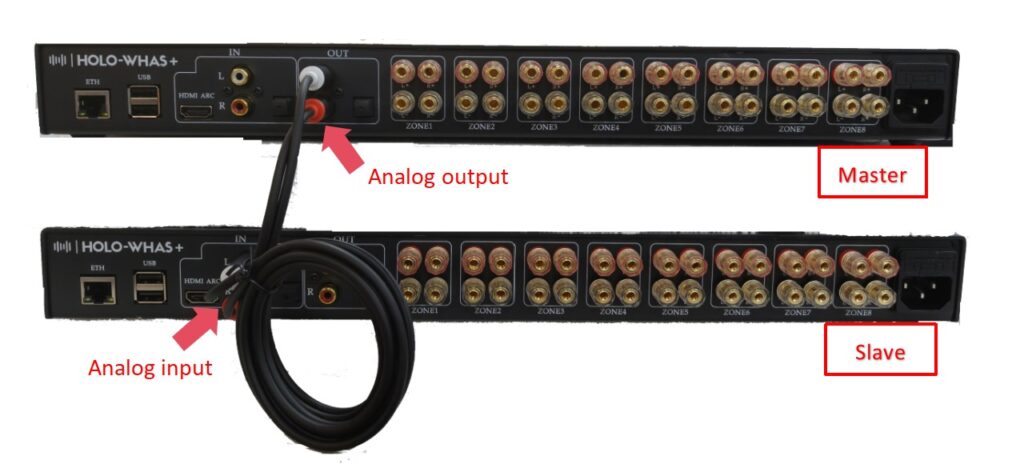
Figure 1. Cascading with analog wire (using HOLOWHAS Plus as example)
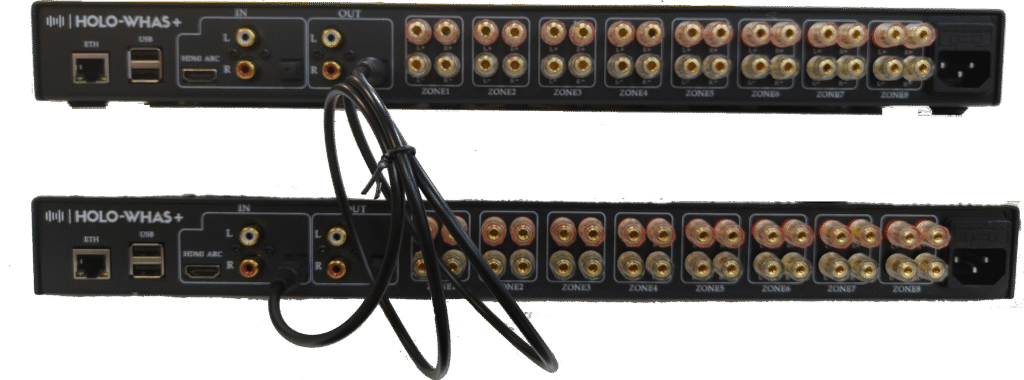
Figure 2. Cascading with optical wire (using HOLOWHAS Plus as example)
2. Setup zones of amplifier
You need to setup zones of amplifier via HoloHome app. There is one thing you should know that master is output cascading audio via zone 1.
For example, we want to use source 1 drive 32 speakers (16 zones). Then we need two amplifiers, one is master, the other is slave, and both amplifiers will use source 1 driver 16 speakers (16 zones) each other.
We should do zone assignment like below (Master and slave will use same settings).
Step1: Tap “Equipment”
Step2: Tap “Config” of master or slave.
Step3: Tap “Output Route”
Step4: Assign all of 8 zones for source 1
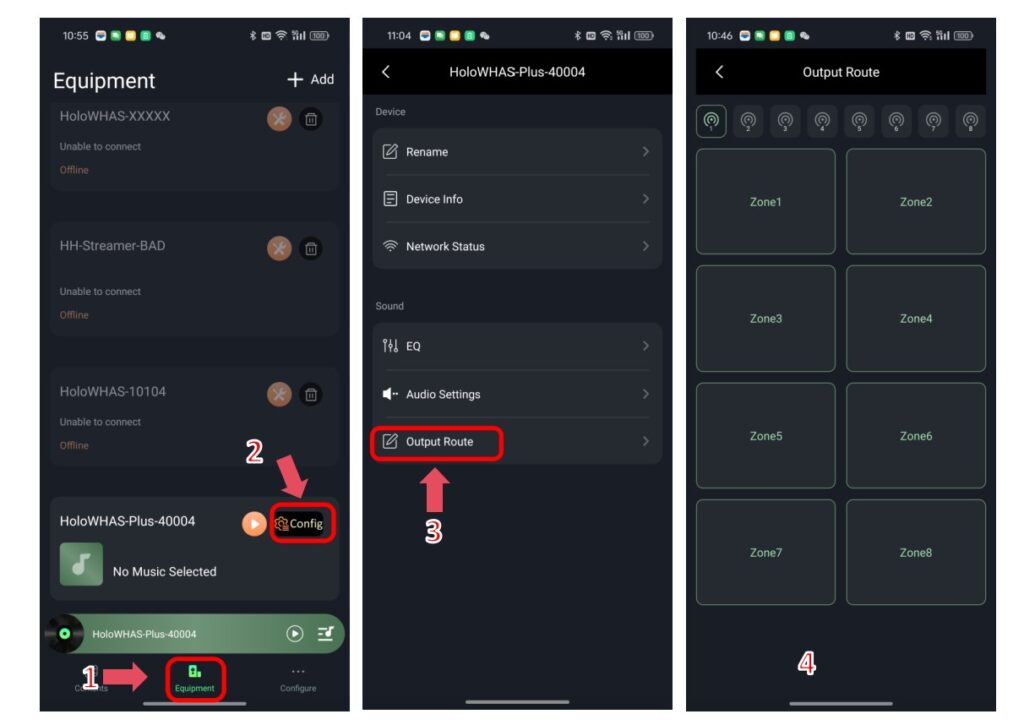
Figure 3. Setup zones
3. Setup source selection of slave
Note: The type of source 1 must be “Line in” or “Optical in”, it depends you cascading with analog wire or cascading with optical wire.
Step1: Tap “Equipment”
Step2: Tap slave amplifier name to make it high light
Step3: Tap “Contents”
Step4: Tap selection of “Input Source1”
Step5: Tap “Line in” or “Optical in”, it depends you cascading with analog wire or cascading with optical wire.
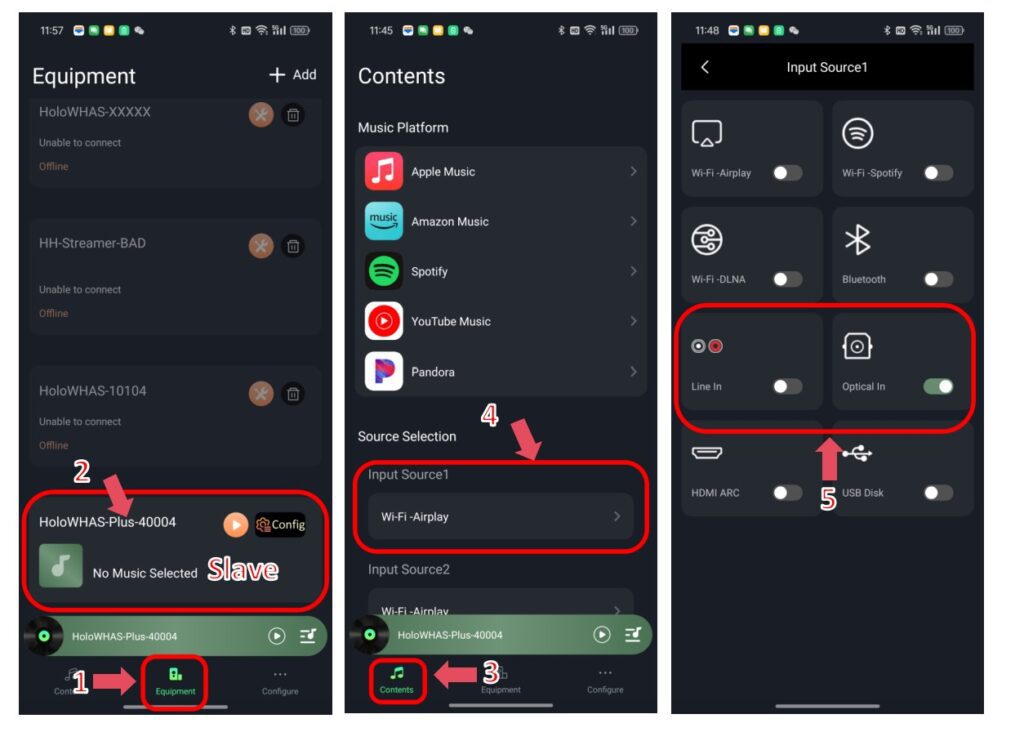
Figure 4. Setup source selection of slave
4. Setup source selection of master
Note: We use source 1 to receive audio from player casting.
Step1: Tap “Equipment”
Step2: Tap master amplifier name to make it high light
Step3: Tap “Contents”
Step4: Tap selection of “Input Source1”
Step5: Tap casting type, it depends what casting type is your music player using.
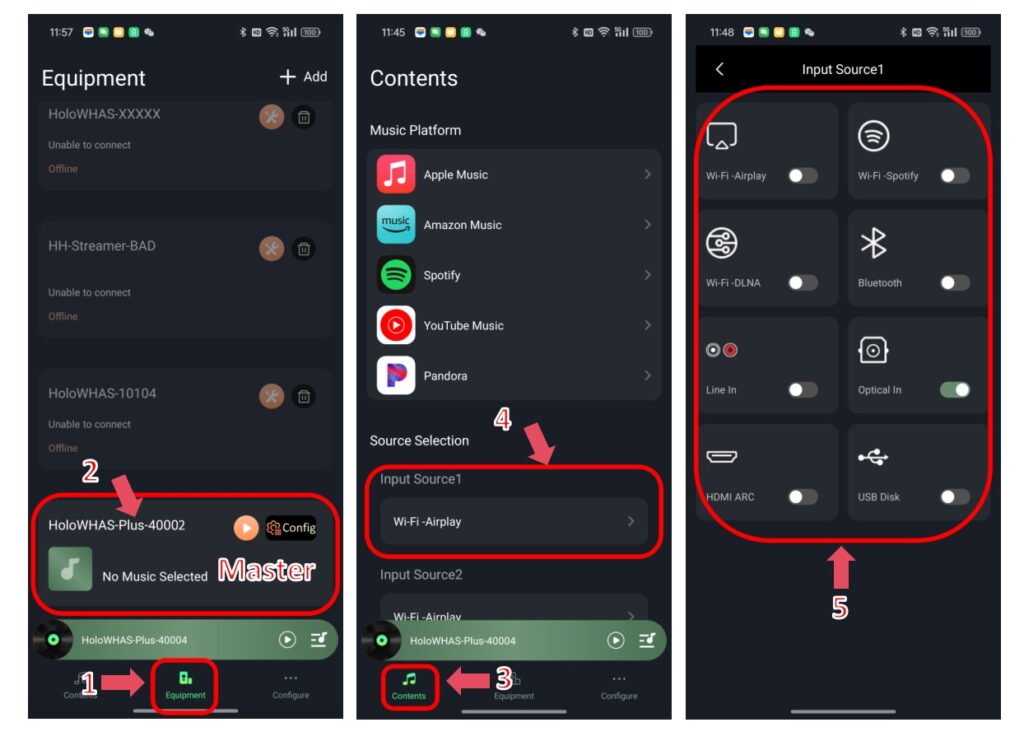
Figure 5. Setup source selection of master