How to Determine the + and - Connections on a Speaker
In audio systems, correctly connecting the positive (+) and negative (–) terminals of a speaker is crucial. It not only affects the quality of the sound but can also impact the performance and safety of your equipment. Here are some methods and steps to determine the positive and negative connections on a speaker.
1. Check the Labels on the Speaker and Amplifier
Most modern speakers and amplifiers will clearly mark the positive (+) and negative (–) terminals. These labels are usually indicated by symbols or colors. For example, the positive terminal might be marked with red or a “+” symbol, while the negative terminal might be marked with black or a “–” symbol.
Steps:
1. Locate the Speaker Terminals: These are typically found on the back or bottom of the speaker.
2. Check the Labels: Confirm the markings for the positive and negative terminals.
3.Locate the Amplifier Terminals: Similarly, check the markings on the amplifier.
2. Use a Multimeter to Detect Polarity
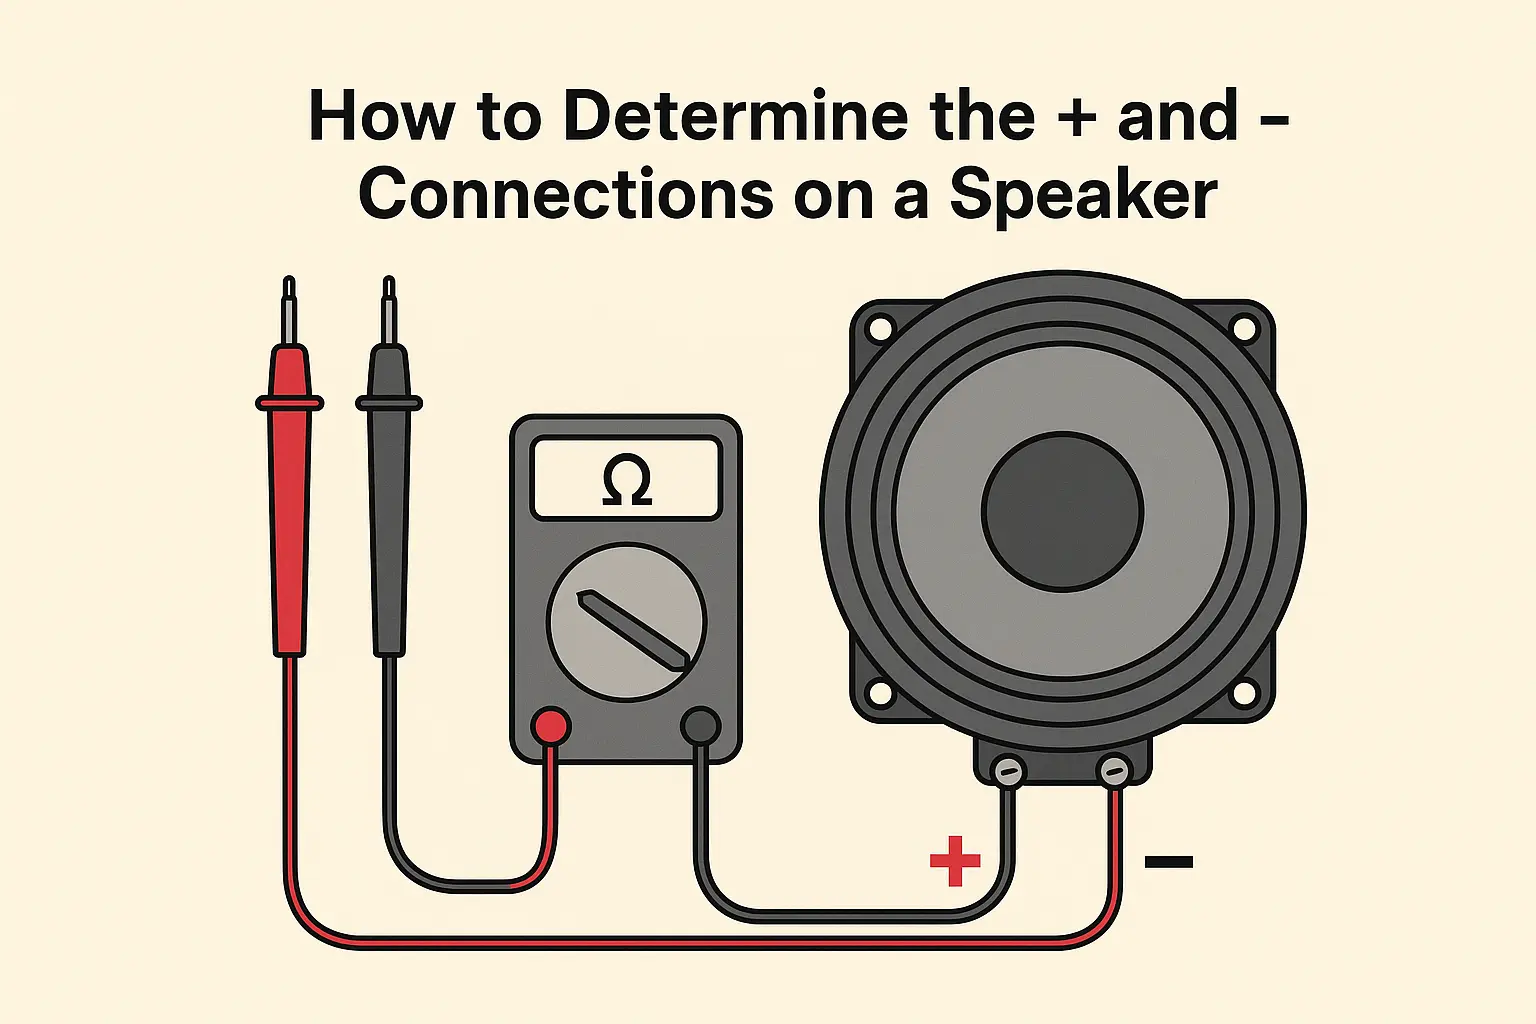
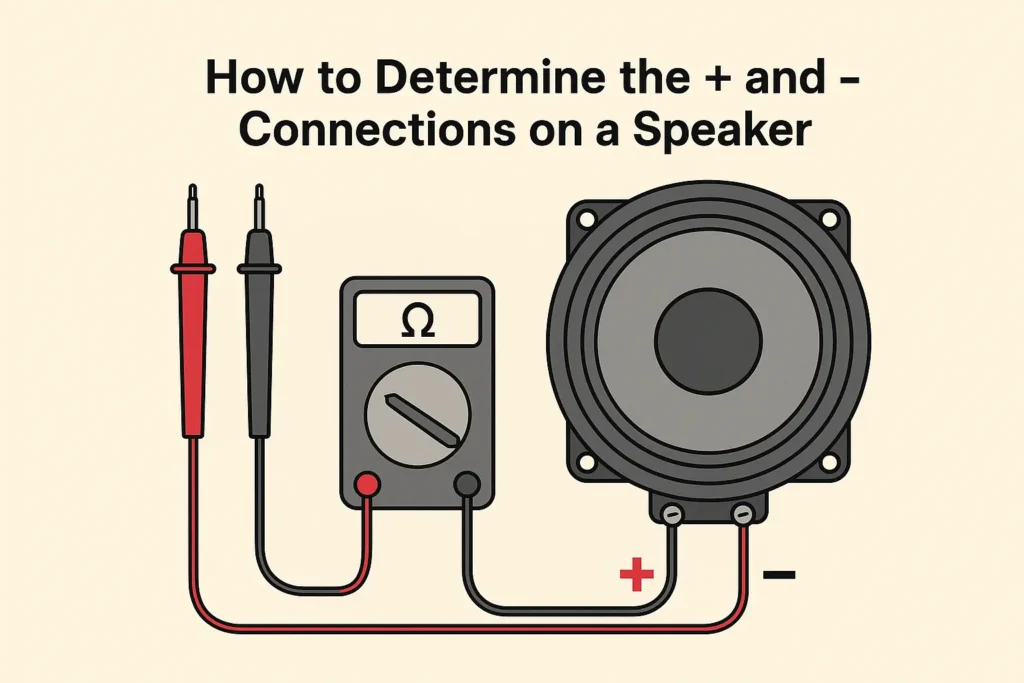
If the speaker or amplifier does not have clear labels, you can use a multimeter to detect the polarity. A multimeter is a versatile electronic measuring tool that can measure voltage, current, and resistance.
Steps:
1. Set Up the Multimeter: Place the multimeter in “diode test” mode or “resistance” mode.
2. Connect the Multimeter: Attach the red probe of the multimeter to one of the speaker terminals and the black probe to the other terminal.
3. Read the Results:
- If the multimeter shows a low resistance value (usually a few ohms to several tens of ohms), the terminal connected to the red probe is the positive terminal.
- If the multimeter shows “OL” (open circuit) or a very high resistance value, the terminal connected to the red probe is the negative terminal.
4. Mark the Polarity: Label the positive and negative terminals on both the speaker and the amplifier to ensure correct connection.
3. Use a Battery to Detect Polarity
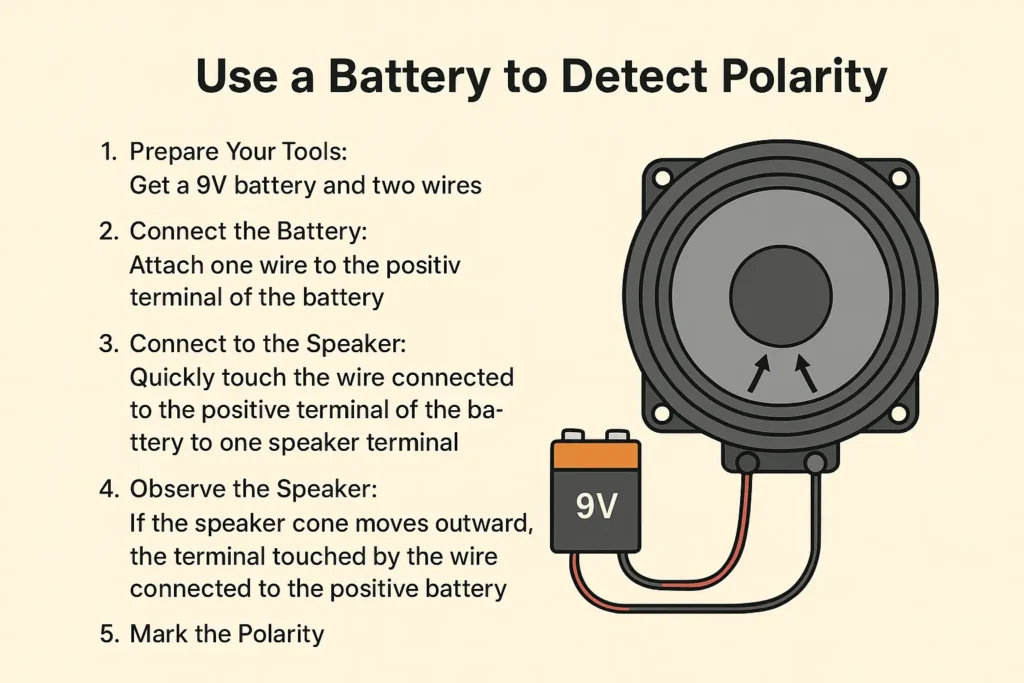
If you don’t have a multimeter, you can use a small battery (such as a 9V battery) to detect the polarity of the speaker. This method is simple but requires careful handling to avoid damaging the speaker.
Steps:
1. Prepare Your Tools: Get a 9V battery and two wires.
2. Connect the Battery: Attach one wire to the positive terminal of the battery and the other wire to the negative terminal.
3. Connect to the Speaker: Quickly touch the wire connected to the positive terminal of the battery to one of the speaker terminals, and touch the wire connected to the negative terminal of the battery to the other speaker terminal.
4. Observe the Speaker:
- If the speaker cone moves outward, the terminal touched by the wire connected to the positive battery terminal is the positive terminal.
- If the speaker cone moves inward, the terminal touched by the wire connected to the positive battery terminal is the negative terminal.
5. Mark the Polarity: Label the positive and negative terminals on both the speaker and the amplifier to ensure correct connection.
4. Precautions
1. Avoid Short Circuits: Be careful not to short-circuit the wires during connection and testing to prevent damage to the speaker or amplifier.
2. Use the Right Tools: If using a multimeter, ensure it is set correctly to avoid misreading.
3. Clear Markings: Clearly label the positive and negative terminals on both the speaker and the amplifier to avoid confusion when connecting.
5.Add Your Heading Text Here
Correctly connecting the positive and negative terminals of a speaker is essential for optimal performance of your audio system. By checking labels, using a multimeter, or using a battery to detect polarity, you can ensure the correct connection of your speakers. Always exercise caution during the process to avoid damaging your equipment.
I hope these methods help you correctly connect your speakers and enjoy a high-quality audio experience!
For more tech articles, visit our website:www.openaudiohome.com/


